 "BlazinAce - Doctor of Internal Combustion" (pbs)
02/06/2014 at 12:32 • Filed to: Tipo
 2
2
 0
0|
"BlazinAce - Doctor of Internal Combustion" (pbs)
02/06/2014 at 12:32 • Filed to: Tipo | 2
| 0 |
I got nothing much to do right now, so I figured I'd share a few pictures of what I've been doing to the Tipo in the last couple days. If I remember correctly, someone had asked for these, or for picture proof of something, so why the hell not, right?
Anyways, I don't have pictures of the bodywork and stuff because I had a friend do it for me, but I had a few other things needed fixing that I decided to photograph. With a potato. Obviously. Notice that the grille is already painted and in place, but it still ooks liek crap. The front badge is off center, and the rubber slats at the top got painted as well, so I'll just look for a new grille later on.
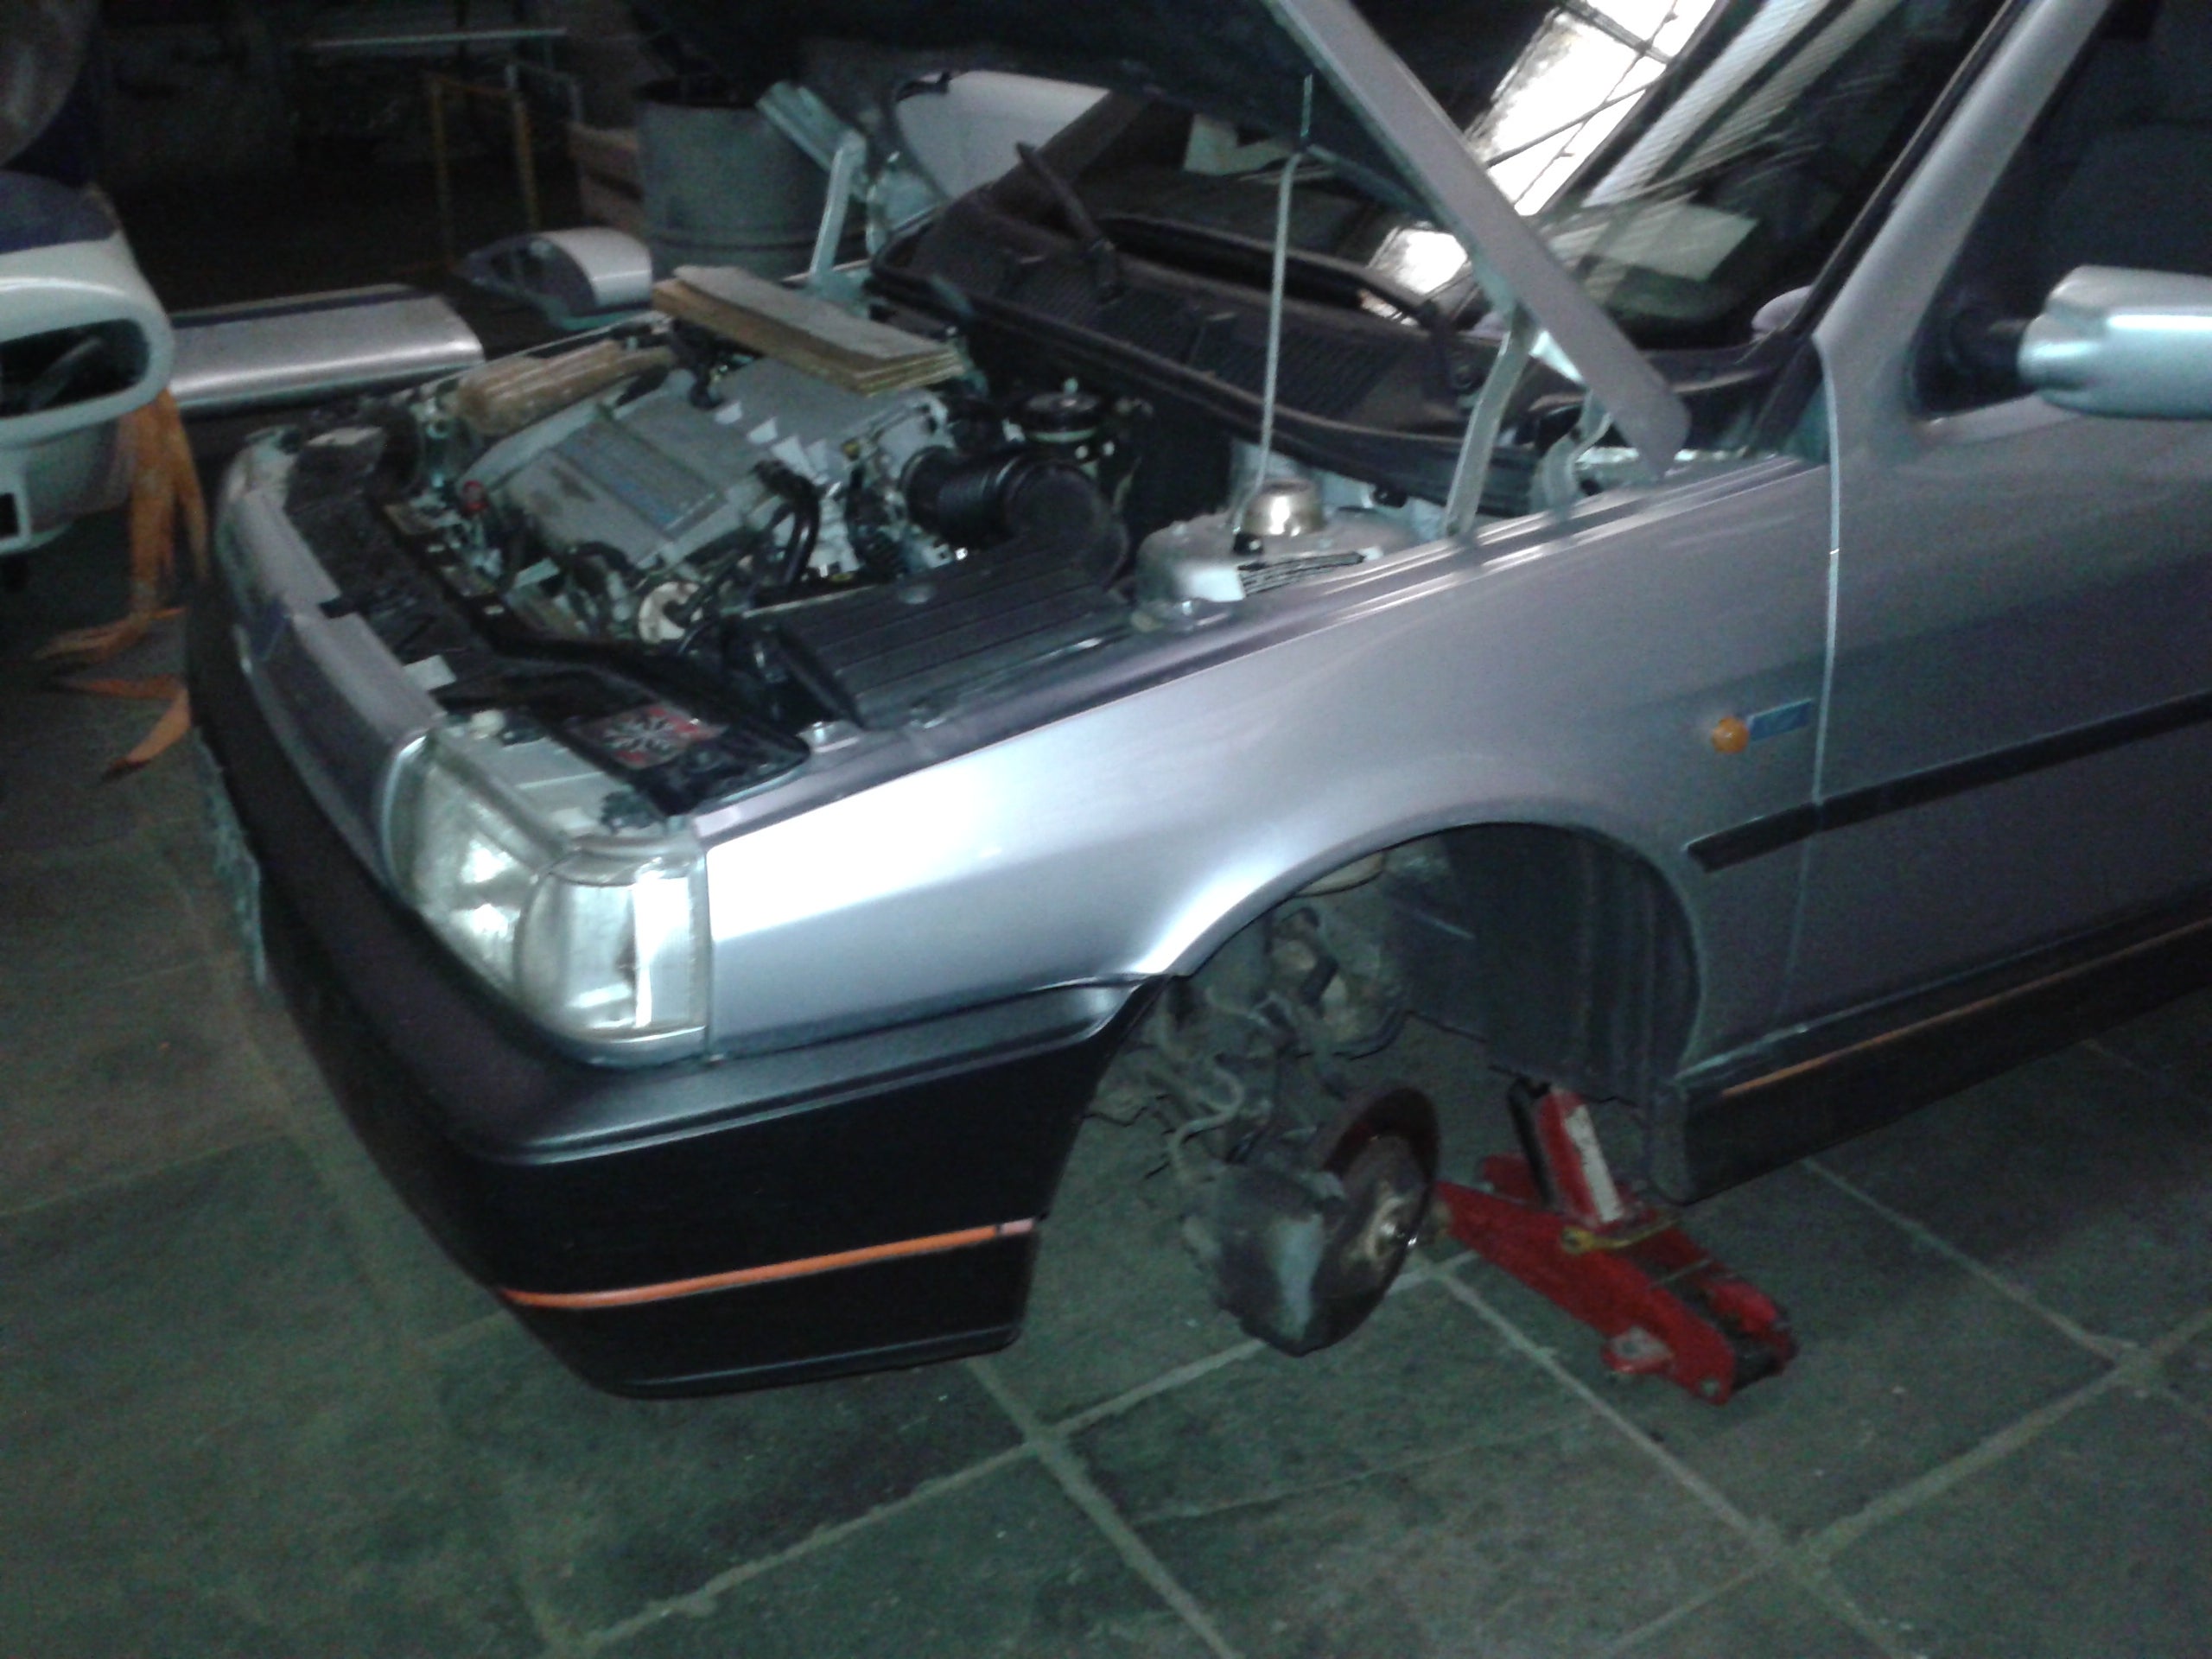
Anyways, aside from the cooling fan going haywire again (Fuck it, I'm taking out the entire dashboard to check every single relay), the parts that have been troubling me the most are the CV joints. These things last for-fucking-ever, but eventually the wear and tear catches up to them and they start slipping, which you can easily identify because of the clicking sound when turning at full lock. Replacing the left CV joint was a breeze, the new part slid right in without the axle having to come out, which is a blessing when everything's cramped like in this car. The right CV joint however, was much harder to crack...
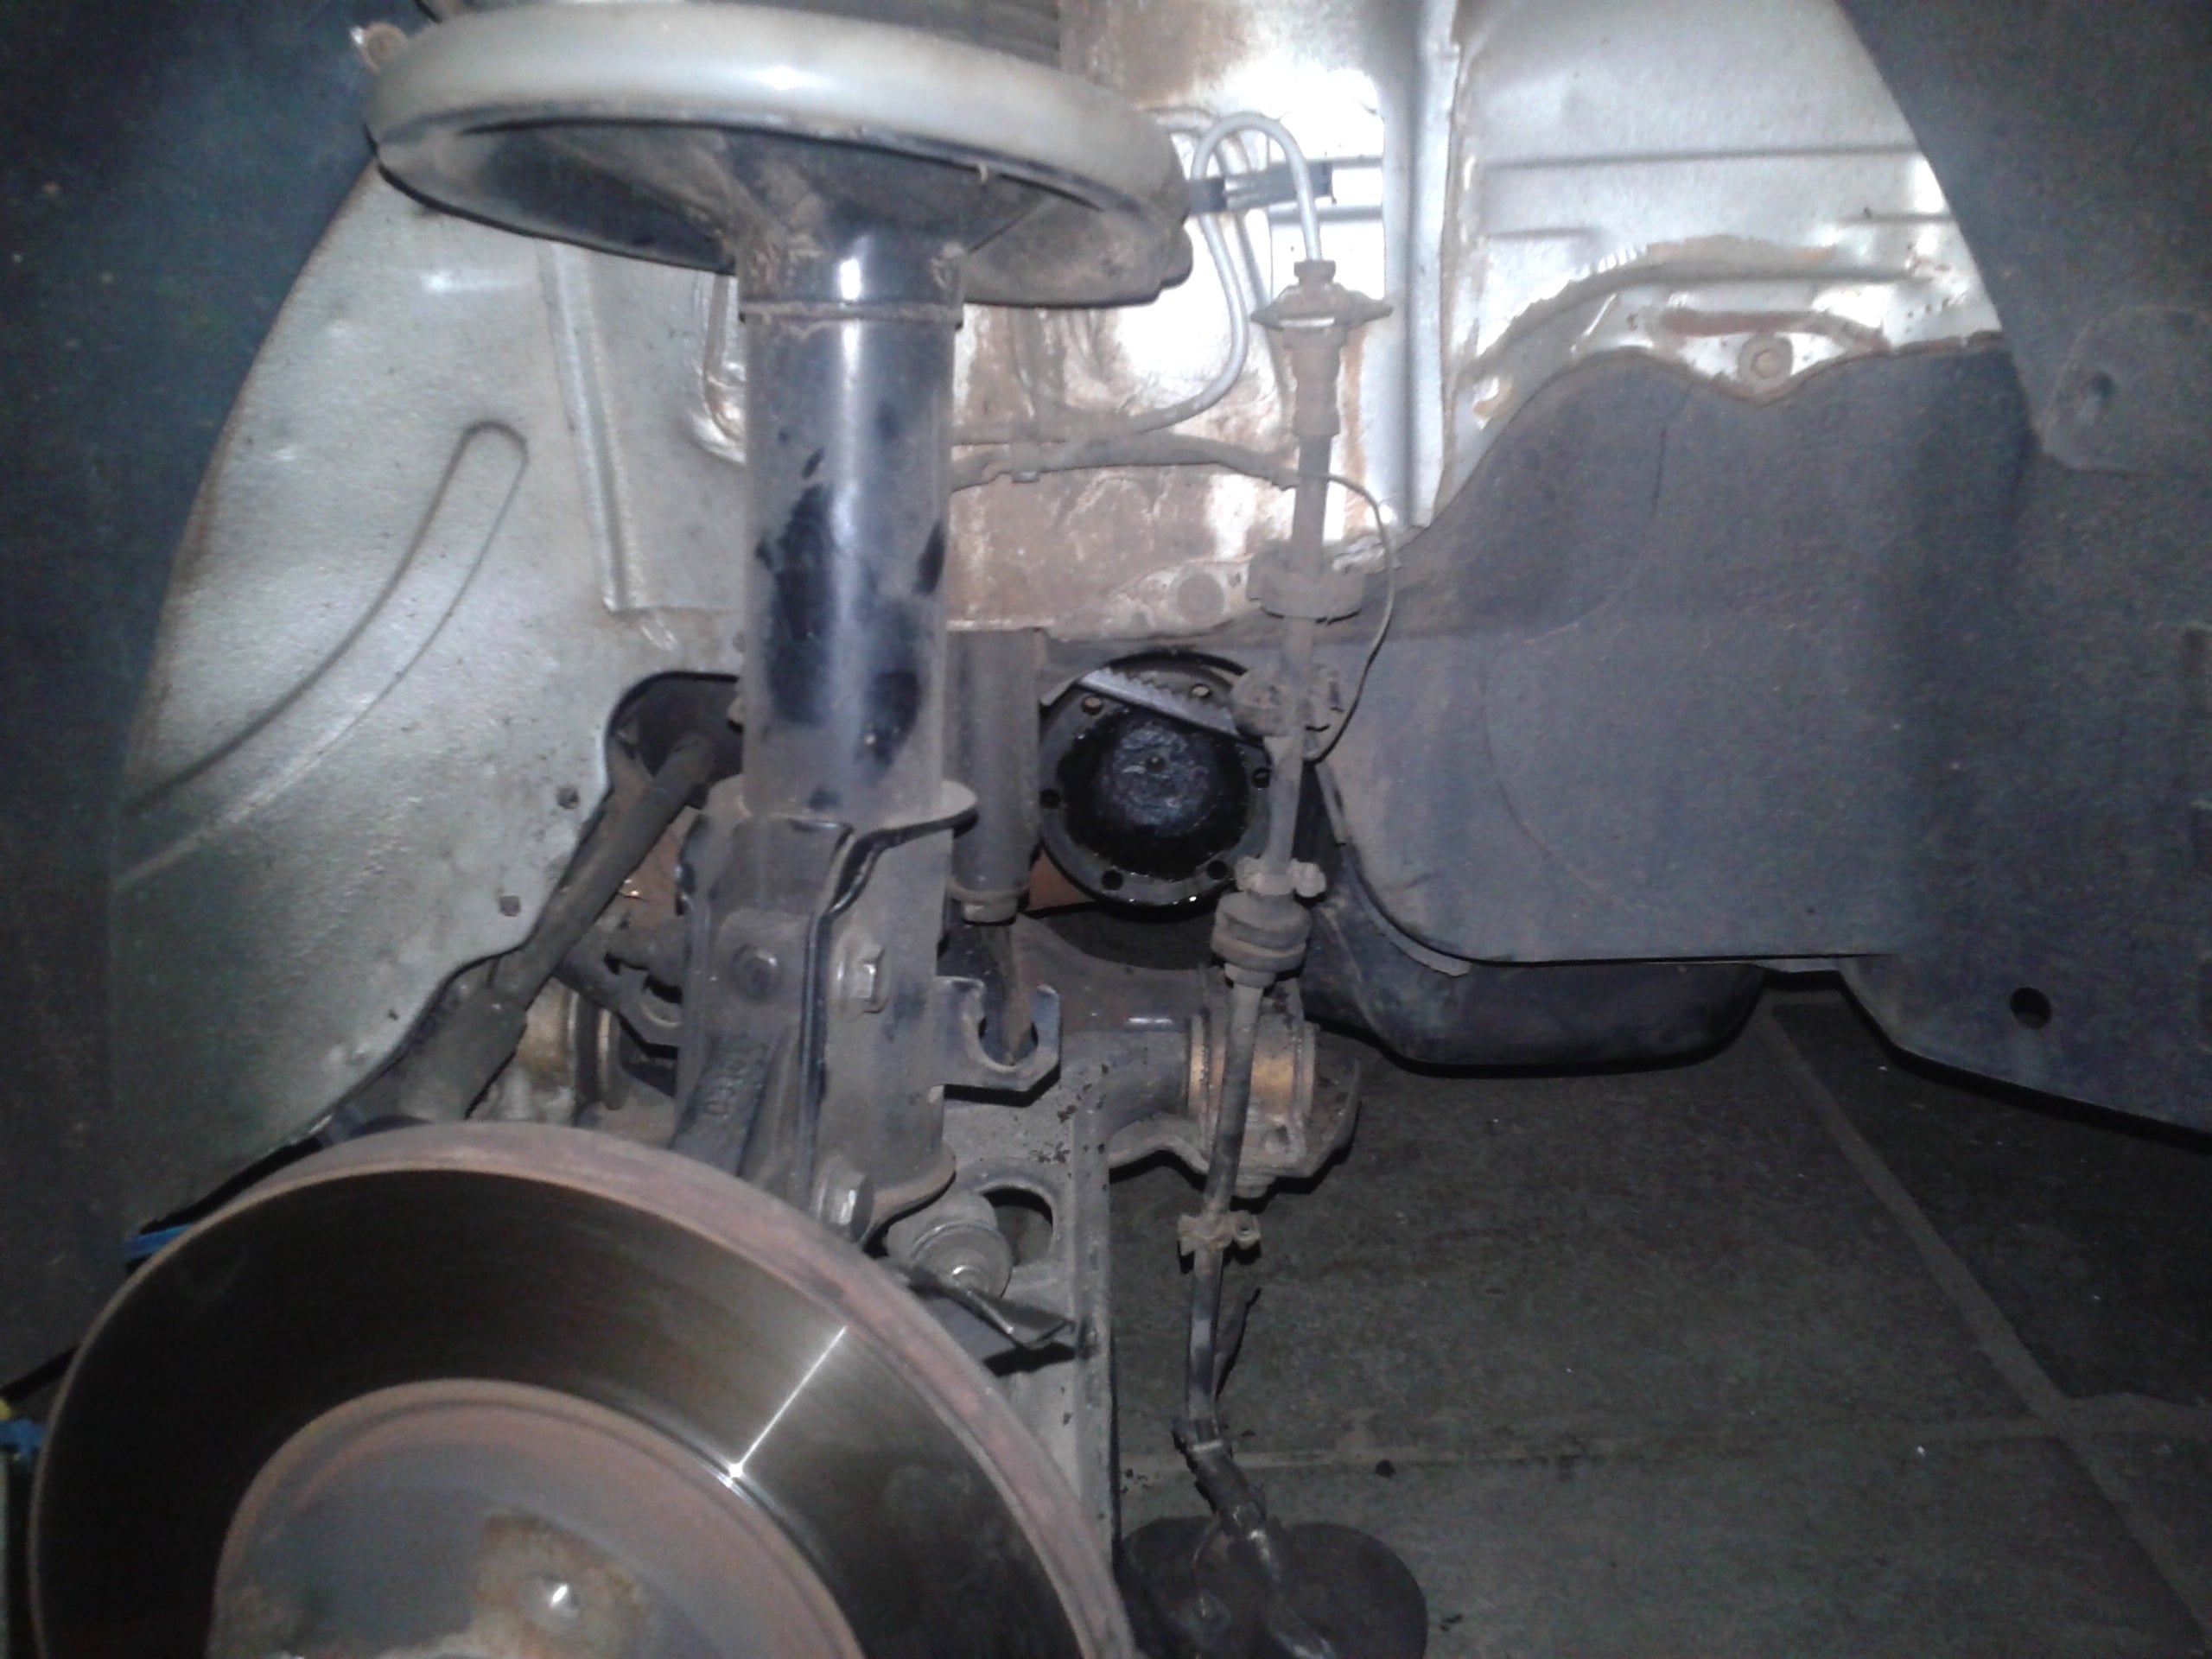
Getting that motherfucker out was a pain in the ass. In the picture above, you can see the suspension strut and swing arm and the brake rotor, slightly pulled to the rear of the car. The axle is bolted to the black housing right in the center of the picture, and the cables to the right are connected to the brake caliper, barely visible resting on the floor. Also notice the complete lack of rust (and fire).
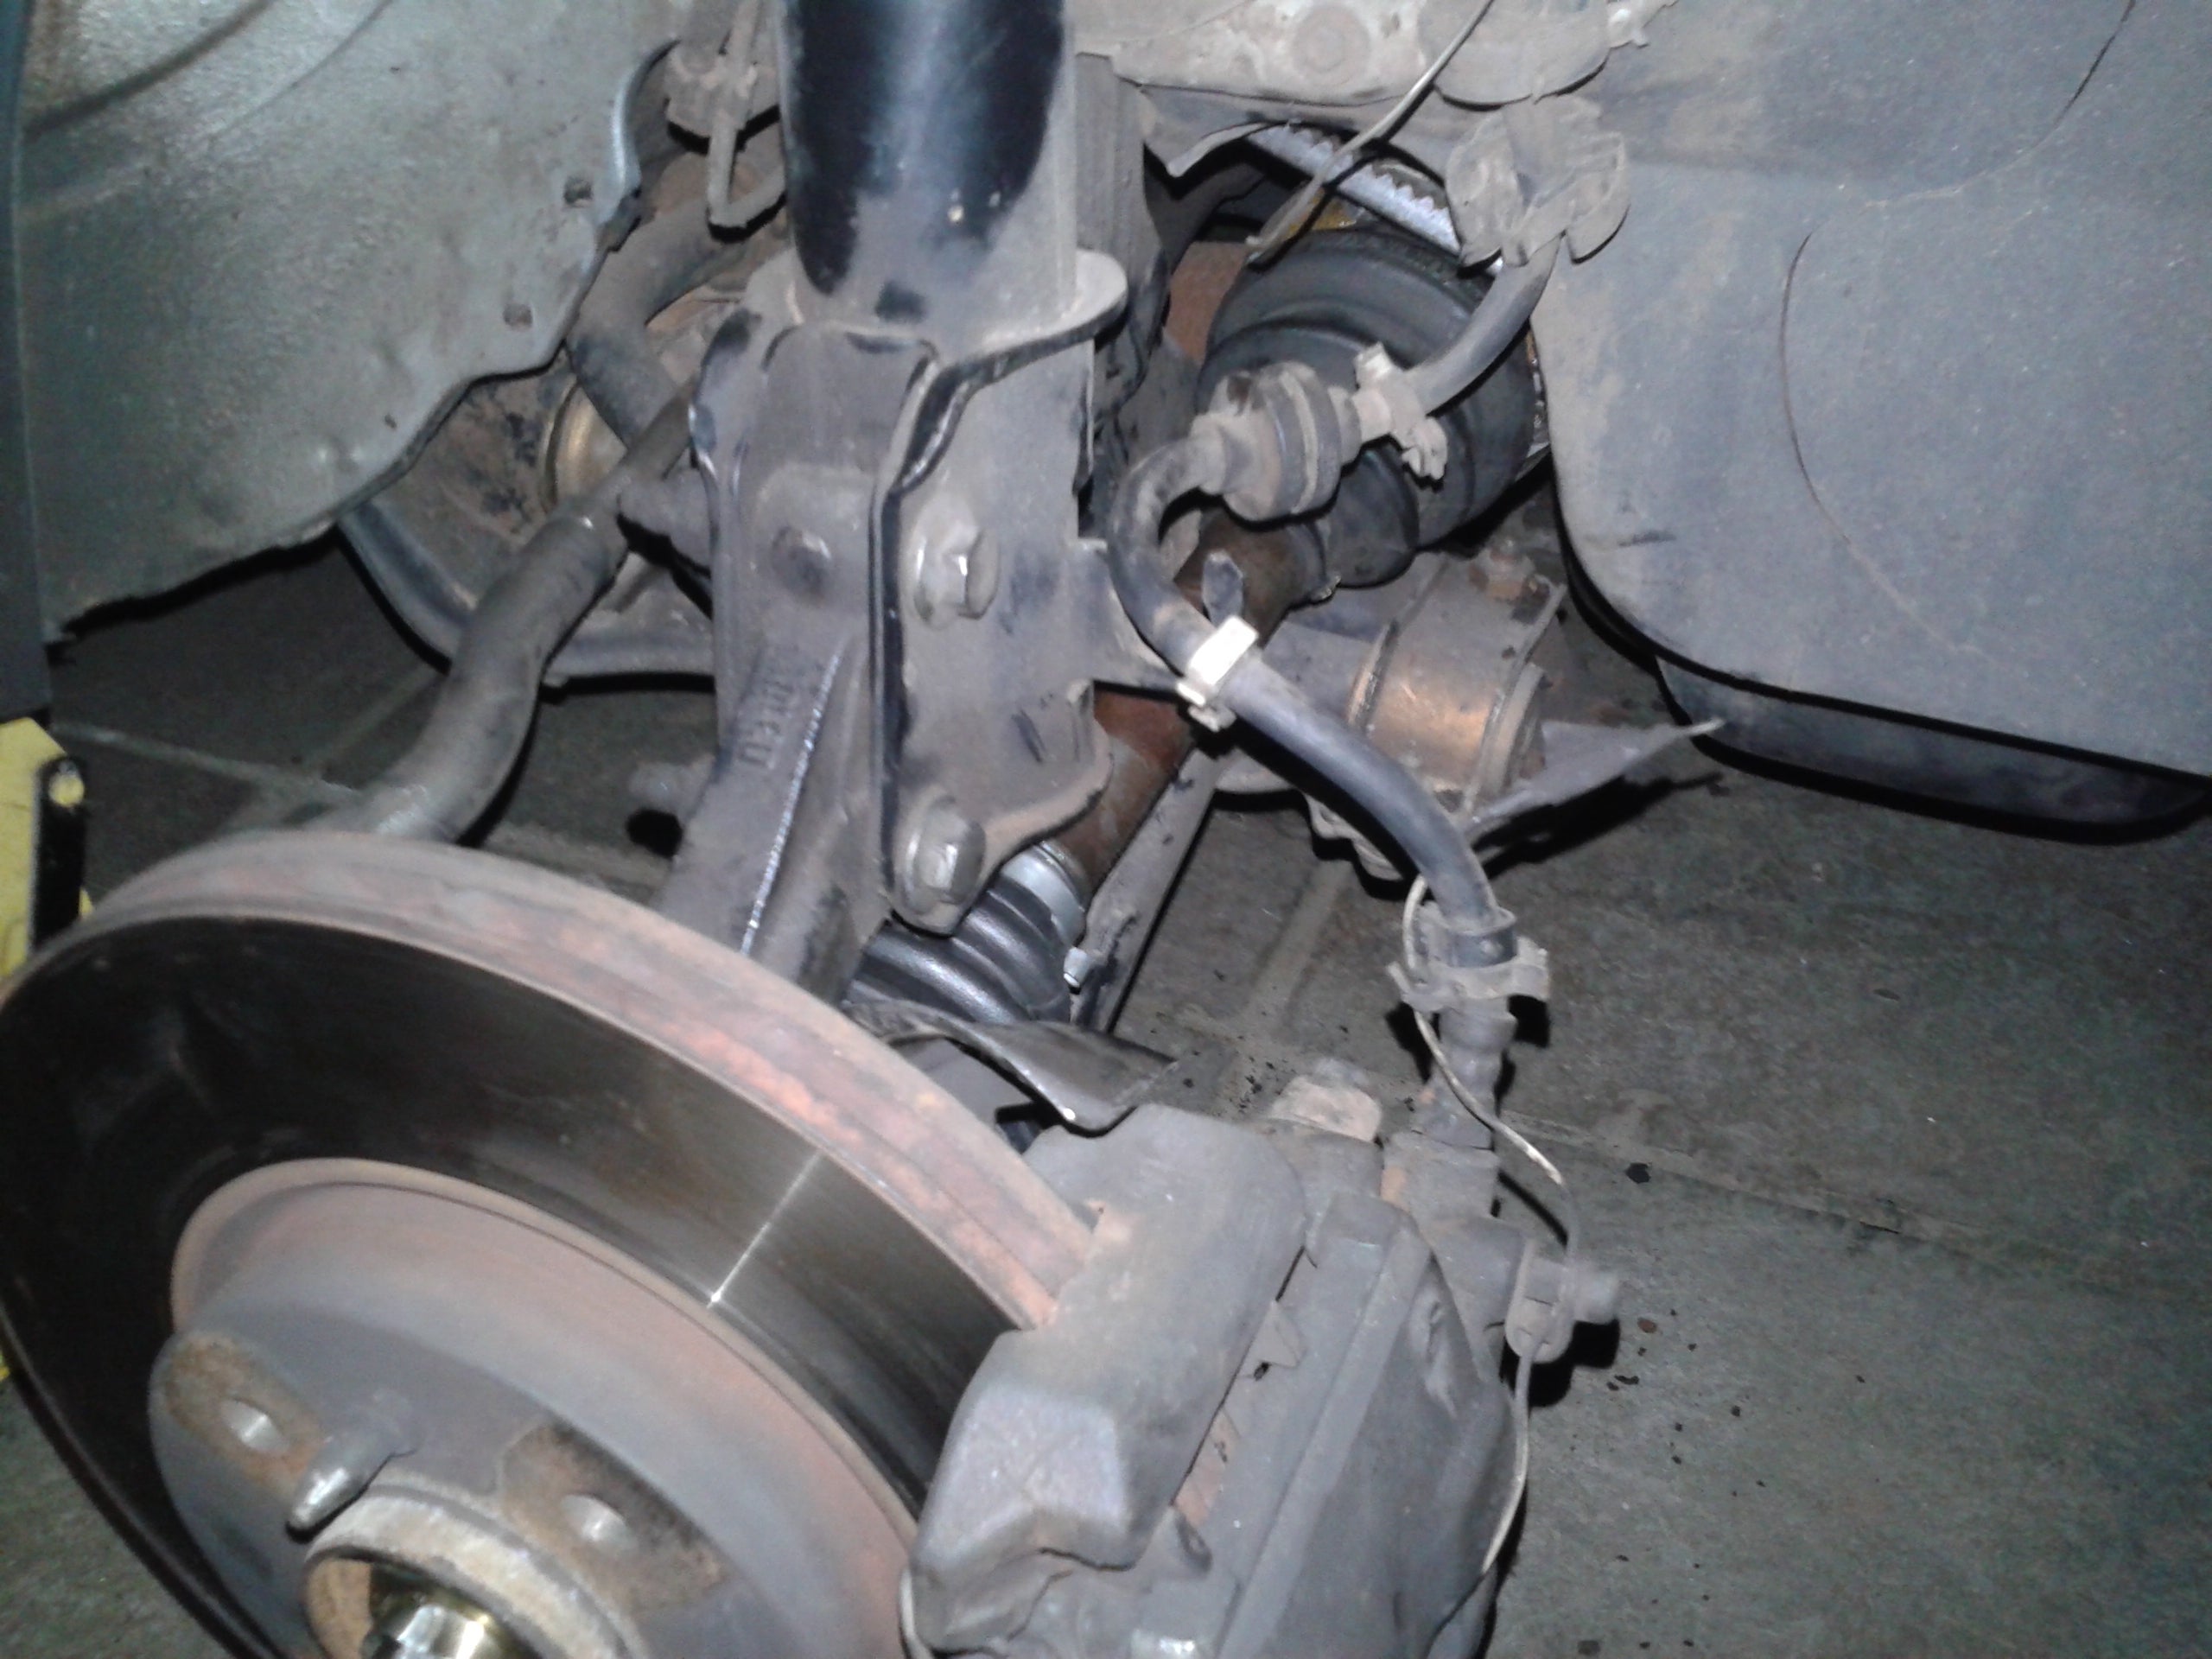
And here's the whole thing after reassembly, minus the wheel, obviously. You can see the new CV joint right behind the brake rotor, it's much cleaner than the rest of the assembly, despite all the grease required to put it in place.
With that out of the way, the next thing I'll tackle is the fuel pump and filter, which are this close to giving up on me, both because of their age and because of shitty Brazilian gas. It's less dirty work, so I'll see if I can get some extra pictures then.